Configuring Checkstyle-IDEA
-
Install the Checkstyle-IDEA plugin by going to
File>Settings(Windows/Linux), orIntelliJ IDEA>Preferences…(macOS).
SelectPlugins, pressBrowse Repository, and find the plugin.
Restart the IDE to complete the installation. -
Click
File>Settings…>Other Settings>Checkstyle -
Set
Scan ScopetoOnly Java sources (including tests), so that the plugin will run checkstyle for our test source codes as well -
Ensure that the
Checkstyle versionis set to8.1. This is the same version that we are using inside Gradle, so that you won’t get any errors due to version incompatibility-
If
Checkstyle versionis not set to8.1, set it to version8.1and clickApply
-
-
Click the plus sign under
Configuration File -
Enter an arbitrary description e.g. addressbook
-
Select
Use a local Checkstyle file -
Use the checkstyle configuration file found at
config/checkstyle/checkstyle.xml -
Click
Next>Finish -
Mark
Activefor the newly imported check configuration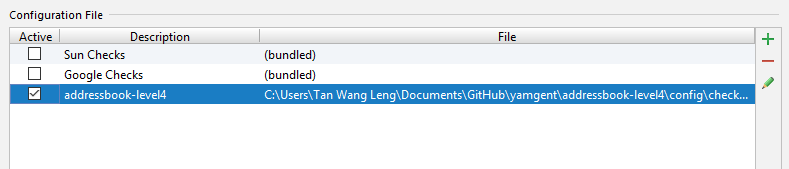
-
Click
OK
Troubleshooting Checkstyle-IDEA
Problem: When importing checkstyle.xml, Checkstyle-IDEA plugin complains that The Checkstyle rules file could not be parsed. … The file has been blacklisted for 60s.
-
Reason:
checkstyle.xmlis written for a particular version, but the plugin was not configured to the correct version. -
Solution: Ensure that you have selected the correct
Checkstyle versionthat matches the version inbuild.gradleand have clickedApply, ascheckstyle.xmlis written for Gradle’s checkstyle.
Problem: After setting up checkstyle.xml, Checkstyle-IDEA plugin does not seem to highlight the errors / real-time scanning seems broken.
-
Reason: The plugin may not immediately run after setting it up.
-
Solution: Restart the IDE.